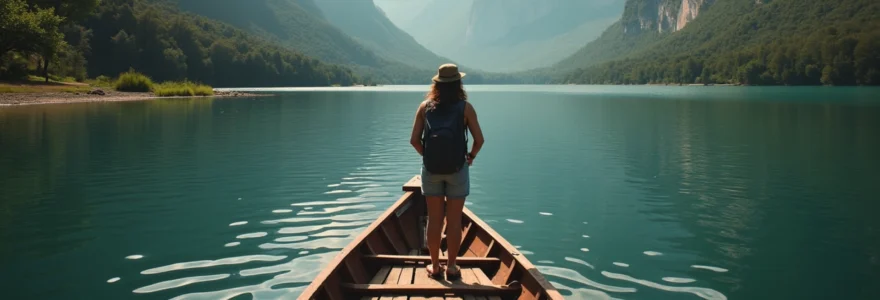
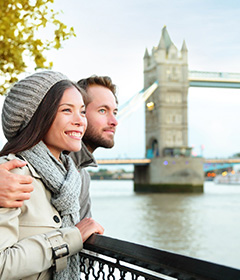
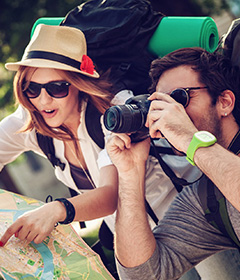
Travelling the world offers countless opportunities to capture breathtaking moments and create lasting memories. Whether you’re exploring ancient ruins, bustling cityscapes, or serene natural landscapes, mastering the art of travel photography can elevate your experiences and allow you to share your adventures with others. In this comprehensive guide, we’ll delve into essential techniques, equipment recommendations, and creative approaches to help you capture stunning travel photographs like a professional.
Essential camera equipment for travel photography
Selecting the right gear is crucial for successful travel photography. While it’s tempting to pack every piece of equipment you own, it’s important to strike a balance between versatility and portability. A lightweight, versatile camera setup will allow you to move freely and capture spontaneous moments without being weighed down.
At the heart of your travel photography kit should be a reliable camera body. Many photographers opt for mirrorless cameras due to their compact size and advanced features. However, DSLRs remain popular for their robust build and extensive lens options. Whichever system you choose, ensure it offers manual controls and the ability to shoot in RAW format for maximum flexibility in post-processing.
When it comes to lenses, versatility is key. A standard zoom lens covering a range from wide-angle to short telephoto (e.g., 24-70mm) is an excellent all-purpose option. For more diverse shooting situations, consider adding a wide-angle lens for landscapes and architecture, and a telephoto lens for wildlife and distant subjects.
Other essential items to include in your kit are:
- A sturdy, lightweight tripod for low-light situations and long exposures
- Extra batteries and memory cards to ensure you never miss a shot
- A polarizing filter to enhance skies and reduce reflections
- A camera bag or backpack designed for travel photography
Remember, the best camera is the one you have with you. Even a high-quality smartphone can produce stunning results when used skillfully. The key is to familiarize yourself with your equipment and learn to make the most of its capabilities.
Mastering composition techniques in diverse landscapes
Composition is the foundation of compelling photography, and mastering various techniques will significantly enhance your travel images. As you explore diverse landscapes, from urban jungles to remote wilderness, applying these composition principles will help you create visually striking and emotionally engaging photographs.
Rule of thirds application in cityscape photography
The rule of thirds is a fundamental composition technique that can dramatically improve your cityscape photography. Imagine dividing your frame into a 3×3 grid and placing key elements along these lines or at their intersections. This creates a more balanced and visually appealing image than centering your subject.
When photographing cityscapes, try aligning the horizon with the upper or lower third line. Place prominent buildings or landmarks at the intersections of these lines to create a sense of balance and draw the viewer’s eye through the image. This technique is particularly effective when capturing skylines or architectural details against dramatic skies.
Leading lines utilization for architectural shots
Leading lines are powerful compositional elements that guide the viewer’s eye through an image, creating depth and visual interest. In architectural photography, these lines are abundant and can be used to great effect. Look for staircases, bridges, roads, or the edges of buildings to create strong compositional lines.
When composing your shot, position these lines to lead towards your main subject or to create a sense of perspective. For instance, a winding road leading to a distant mountain or a series of arches drawing the eye to a central courtyard can create a compelling visual narrative. Experiment with different angles to find the most effective way to use these lines in your compositions.
Framing techniques for natural wonders like machu picchu
Framing is a technique that uses elements within the scene to create a natural border around your main subject. This not only adds depth to your image but also helps to focus the viewer’s attention on the key point of interest. When photographing natural wonders like Machu Picchu, look for opportunities to use the surrounding landscape as a frame.
You might use an archway in the ruins to frame a distant mountain peak, or position yourself behind foliage to create a natural vignette around the ancient city. This technique can add context and scale to your images, helping to convey the grandeur of the location. Remember to experiment with different positions and focal lengths to find the most effective frame for your subject.
Symmetry and reflection in water-based scenes
Water-based scenes offer unique opportunities for creating striking compositions through symmetry and reflection. Whether you’re photographing a tranquil lake, a Venetian canal, or a puddle in a city street, look for ways to incorporate reflections into your images.
Perfect symmetry can create a powerful visual impact. Position your camera so that the reflection creates a mirror image of the scene above. This works particularly well with architectural subjects or dramatic landscapes. Alternatively, you can use partial reflections to add an element of abstraction or to create more dynamic compositions.
To capture clear reflections, shoot during calm conditions and use a polarizing filter to control the amount of reflection visible. Experiment with different shutter speeds to either freeze the water’s surface or create a smooth, glassy effect that enhances the reflection.
Optimal camera settings for various travel scenarios
Understanding how to adjust your camera settings for different travel scenarios is crucial for capturing high-quality images in diverse conditions. While automatic modes can produce decent results, mastering manual controls allows you to achieve your creative vision and tackle challenging lighting situations with confidence.
Aperture priority for depth of field control in portraits
Aperture priority mode (often denoted as ‘A’ or ‘Av’ on your camera dial) is ideal for portrait photography during your travels. This mode allows you to control the depth of field – the area of the image that appears in sharp focus – while the camera automatically adjusts the shutter speed for proper exposure.
For portraits, a wide aperture (low f-number like f/2.8 or f/4) creates a shallow depth of field, blurring the background and making your subject stand out. This is particularly effective for isolating a person against a busy street scene or market backdrop. Conversely, when photographing groups or when you want to show more of the environment, use a smaller aperture (higher f-number like f/8 or f/11) to keep more of the scene in focus.
Shutter speed adjustments for capturing motion in markets
When photographing bustling markets or lively street scenes, controlling your shutter speed allows you to either freeze action or create a sense of motion. Shutter priority mode (often labeled as ‘S’ or ‘Tv’) is ideal for this purpose, allowing you to set the shutter speed while the camera adjusts the aperture accordingly.
To freeze fast-moving subjects like people or vehicles, use a fast shutter speed of 1/250th of a second or faster. This will ensure sharp, crisp images even in dynamic environments. Alternatively, to convey a sense of motion and energy, experiment with slower shutter speeds around 1/15th to 1/60th of a second. This technique can create interesting motion blur effects, particularly when panning with moving subjects or capturing flowing water.
ISO management in low-light conditions like night markets
ISO controls your camera’s sensitivity to light and is crucial for managing exposure in low-light conditions. When photographing night markets or dimly lit interiors, you’ll often need to increase your ISO to maintain a fast enough shutter speed for sharp images.
Start by setting your aperture to its widest setting (lowest f-number) and adjust your shutter speed to the slowest you can hand-hold without introducing camera shake (typically 1/focal length of your lens). If you still need more light, gradually increase your ISO. Modern cameras can produce clean images at ISO 3200 or even higher, but be aware that very high ISO settings can introduce noise into your images.
To minimize noise in low-light situations, consider using a tripod or stabilizing your camera on a solid surface. This allows you to use longer shutter speeds and keep your ISO lower, resulting in cleaner, higher-quality images.
White balance techniques for challenging lighting situations
White balance is often overlooked but can significantly impact the mood and color accuracy of your travel photographs. While auto white balance works well in many situations, challenging lighting conditions may require manual adjustment to achieve natural-looking colors.
In artificial lighting situations, such as indoor markets or street scenes at night, experiment with the preset white balance options on your camera (e.g., tungsten, fluorescent) or use a custom white balance setting. For more precise control, use a gray card or a white balance tool to set a custom white balance for the specific lighting conditions.
When shooting in RAW format, you have the flexibility to adjust white balance in post-processing without loss of image quality. However, getting it right in-camera can save time in editing and help you visualize the final image more accurately while shooting.
Post-processing workflow for travel photographs
Post-processing is an essential step in creating impactful travel photographs. A well-defined workflow can help you efficiently enhance your images while maintaining a consistent style across your portfolio. While the specific steps may vary depending on your software and personal preferences, here’s a general approach to post-processing your travel images:
- Import and organize your images, tagging and rating them for easy selection
- Perform basic adjustments like exposure, contrast, and white balance correction
- Fine-tune color and tonal range using HSL (Hue, Saturation, Luminance) adjustments
- Apply local adjustments such as dodging and burning to enhance specific areas
- Use sharpening and noise reduction techniques to refine image quality
When editing travel photographs, strive to enhance the natural beauty of the scene rather than drastically altering reality. Subtle adjustments can often have the most significant impact, allowing the authenticity of your experiences to shine through.
Remember, post-processing should complement your in-camera techniques, not compensate for poor photography. The goal is to refine and elevate your already strong images.
Consider developing a set of presets or adjustment recipes that reflect your personal style. This can help streamline your workflow and create a cohesive look across your travel portfolio. However, be flexible in your approach, as each image may require unique adjustments to best convey its story.
Storytelling through photo essays and series
Travel photography goes beyond capturing individual moments; it’s about weaving those moments into compelling visual narratives. Creating photo essays and series allows you to delve deeper into the stories of the places you visit and the people you encounter. This approach not only enhances your own understanding of your travels but also provides a more immersive experience for your audience.
Curating images for a cohesive narrative
When curating images for a photo essay or series, start by identifying the central theme or story you want to convey. This could be the daily life in a specific location, the progression of a festival, or the journey along a particular route. Select images that not only stand strong individually but also work together to build a comprehensive narrative.
Consider the variety in your selection. Include wide shots that establish the setting, medium shots that show interactions and activities, and close-ups that highlight details and emotions. This range of perspectives helps to create a more complete and engaging story.
Sequencing techniques for visual impact
The order in which you present your images can significantly impact the narrative flow and emotional resonance of your photo essay. There are several approaches to sequencing:
- Chronological: Following the natural progression of events
- Thematic: Grouping images by subject matter or visual elements
- Emotional: Arranging images to create a specific mood or feeling
Experiment with different sequences to find the most effective way to tell your story. Pay attention to the visual flow between images, using similarities in color, composition, or subject matter to create smooth transitions. Contrast can also be powerful, using juxtaposition to highlight differences or create tension within your narrative.
Incorporating local culture in photo stories
Authentic representation of local culture is crucial in travel photography. Strive to capture images that go beyond surface-level observations and tourist attractions. Engage with local communities, learn about their traditions, and seek permission before photographing individuals or sacred sites.
Look for opportunities to showcase daily life, traditional crafts, local cuisine, and cultural events. These elements help to create a more nuanced and respectful portrayal of the places you visit. Consider including contextual information or captions with your images to provide deeper insights into the cultural significance of what you’ve captured.
Balancing detail and overview shots in a series
A well-rounded photo series should include both broad, scene-setting images and intimate detail shots. This balance helps to create a comprehensive view of your subject while maintaining visual interest throughout the series.
Start with establishing shots that give viewers a sense of place and context. Then, intersperse these with closer views that highlight specific aspects of your story. Detail shots can reveal textures, colors, and small moments that might be overlooked in wider views but are essential to the overall narrative.
Consider using a mix of photographic styles within your series. Combine candid street photography with more formal portraits, or abstract detail shots with traditional landscapes. This variety can help maintain viewer engagement and provide a multi-faceted representation of your travel experiences.
Ethical considerations in travel photography
As travel photographers, we have a responsibility to approach our craft with respect, integrity, and cultural sensitivity. Ethical considerations should be at the forefront of our minds as we capture and share images from around the world. Here are some key principles to guide your practice:
Respect for local customs and traditions is paramount. Before photographing religious ceremonies, sacred sites, or individuals, take the time to understand local customs and seek permission when appropriate. Some cultures have specific beliefs about photography, and it’s crucial to honor these perspectives.
Avoid exploitative or voyeuristic photography. While capturing authentic moments is important, it should never come at the expense of someone’s dignity or privacy. Be particularly mindful when photographing vulnerable populations or in economically disadvantaged areas.
Accurate representation is a cornerstone of ethical travel photography. Strive to portray places and people authentically, avoiding stereotypes or misrepresentations. This includes being thoughtful about post-processing choices that might alter the reality of a scene.
Travel photography should foster understanding and connection between cultures, not perpetuate harmful stereotypes or misconceptions.
Consider the potential impact of sharing your images. While social media can be a powerful platform for showcasing your work, be mindful of geotagging sensitive locations that might be negatively affected by increased tourism. Similarly, think carefully about how your images might be used or interpreted by others.
Compensation and consent are important ethical considerations, especially when photographing individuals. If you’re creating images for commercial purposes, ensure that you have proper releases and consider fair compensation for your subjects. Even for personal work, it’s often appropriate to offer prints or copies of the images to those you’ve photographed.
Lastly, educate yourself about the places you’re visiting and the communities you’re photographing. The more you understand about local history, culture, and current issues, the better equipped you’ll be to create respectful and meaningful images.
By adhering to these ethical principles, you not only protect the integrity of your subjects but also enhance the authenticity and value of your travel photography. Remember that as photographers, we have the power to shape perceptions and narratives about the places we visit. It’s a privilege that comes with significant responsibility.
As you continue to develop your travel photography skills, keep these ethical considerations at the heart of your practice. Strive to create images that not only capture the beauty and diversity of the world but also foster cross-cultural understanding and respect. Your photography can be a powerful tool for storytelling, education, and connection – use it wisely and ethically.


